RSS
 

Posts Tagged ‘tools’

20 Great Web Applications Alternatives to Usual Desktop Software

02 Jan

Desktop Software has been a great help in our computer work purposes. They serve as our working tool on our projects, designs, hobbies, interest etc. But web apps have set a great trend over the web. Developers of web applications created applications that are likely powerful as the desktop software but create more great output and easiness.  The best thing is that you don’t need to install any of these web apps to use. Just browse over the web and visit these great web applications.

In this article, I’ll be presenting 20 great web applications alternatives to your usual desktop software. Hope you will love it.

1. Google Docs

Google Docs serves as your online productivity tool. It will let you create your documents, spreadsheets, presentations and more online writing tool.

Web_apps_alternatives_1

Alternative for :

  • Microsoft Office
  • Open Office

2. Meebo

Meebo is a web platform for your mostly chat applications. You can login your IM accounts at the same time or individual accounts.

Web_apps_alternatives_2

Alternative for:

  • Facebook Chat
  • Yahoo Messenger
  • AIM
  • Windows Live Messenger

3. Slide Rocket

Presentations are really vital tool for business, education , projects and more. With Slide Rocket, a web presentation tool that allows you to create your own presentation. It presents some of the features in PowerPoint.

Web_apps_alternatives_3

Alternative for:

  • Microsoft PowerPoint
  • OpenOffice Impress

4. Aviary

Aviary is a powerful web creation tools for photo editing, logos, web templates, color palettes , audio editing and more.  There list includes Phoenix: Image Editor, Toucan: Color Editor, Myna: Audio Editor, Peacock: Effects Editor, Raven: Vector Editor, Falcon: Image Markup and Roc: Music Creator.

Web_apps_alternatives_4

Alternative for:

  • Adobe Photoshop
  • Adobe Illustrator
  • Soundbooth

5. Mint

Are you having a hard time to manage your money? Then Mint is all you need. It is a web tool to access to your free personal financial and online management tool.  It will help you to organize your financial accounts, set your budgets needs, and put up your savings.

Web_apps_alternatives_5

Alternative for:

  • Quicken

6. JayCut

JayCut is a web video editing software. With a user-friendly environment, it will let you create your videos, add and edit clips, transitions, effects, audio, download, export in Youtube and more.

Web_apps_alternatives_6

Alternative for:

  • Windows Movie Maker
  • Ulead
  • Other Video Editing Software

7. WobZip

Wobzip is an online tool that makes you uncompressed your files on the fly. It supports different compression format such as ZIP, RAR, and more zip formats. It has also an active scanner that scan your compressed files before unzipping it.

Web_apps_alternatives_7

Alternative for:

  • Unzipping Softwares

8. Zamzar

Zamzar is a powerful online file conversion tool. It converts various formats for documents, image, music, video, e-book, compressed files, cad formats. Just follow 4 easy steps to convert your files instantly.

Web_apps_alternatives_8

Alternative for:

  • File Conversion Software

9. Hulu

Hulu is a video/TV streaming website that lets you watch your favorite tv shows right at your computer. If you missed some of your favorites episode you can just tune in here and enjoy watching.  Hulu is a US exclusive website, but if you are outside the US and trying to access it, you can try this link.

Web_apps_alternatives_9

Alternative for:

  • TV Tuner Software

10. TokBox

If you love to video chat, TokBox is a great online video chatting applications. For free users, you can chat up to 20 people. Just simply sign up,invite your friends and start video chatting.

Web_apps_alternatives_10

Alternative for:

  • Video Chat

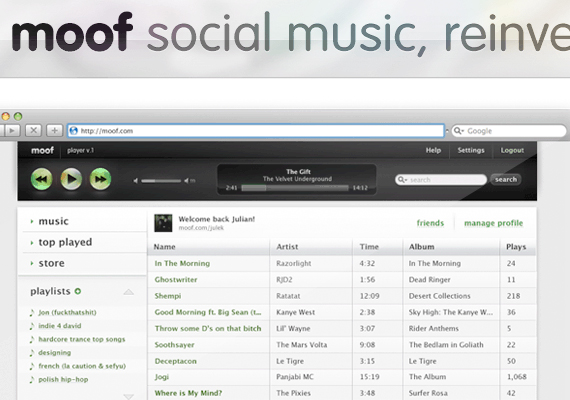
11. Moof

Moof is an online web streaming music online for your favorite music. It is like bringing your all favorite music rolled into one place. One of the great feature is you can export your iTunes library and put it into web so you will never missed out your favorite tune.

Web_apps_alternatives_11

Alternative for:

  • iTunes
  • Music Streaming Software

12. ESET Online Virus Scanner

Everyone wants to be secure in terms of viruses and malware. ESET Online Virus Scanner deep scan your PC using your web browser.  The good thing is that you don’t need to install the software and it is always up to date.

Web_apps_alternatives_12

Alternative for:

  • Anti Virus Software

13. Bitlet

Bitlet is a web application that lets you download your torrents. Just upload .torrent file on your computer or direct Bitlet to torrent and Bitlet will do it for you.

Web_apps_alternatives_13

Alternative for:

  • BitTorrent Client

14. icloud

icloud is a web operating system over the web. It is like bringing your own desktop and files running in your web browser that includes an office suite, media player, chat client, games, productivity tool, utility applications and more. Now you won’t worry that you are working in a different PC.

Web_apps_alternatives_14

Alternative for:

  • Operating System

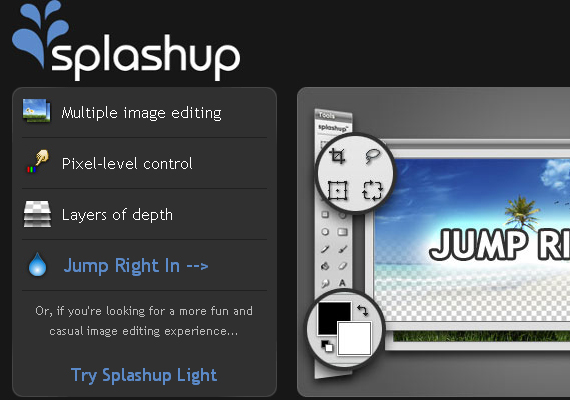
15. Splashup

Splashup is a powerful editing tool and photo manager.  It will let you manage your images and save it in different format. Various features that are likely with Photoshop.

Web_apps_alternatives_15

Alternative for:

  • Image Editing Tool

16. Wufoo

Wufoo is a great building tool for your forms, invitations and survey applications. It makes your collecting of data much easier and in customize way.

Web_apps_alternatives_16

Alternative for:

  • Survey Creating Tool

17. Google Voice

Google Voice makes a huge deal in international calling communication. It delivers various features such as voicemail transcription, one number calling, sms to email, block callers, screen callers, conference call and more. Bringing your all phone into your gmail account given that you are in US and Canada.

Web_apps_alternatives_17

Alternative for:

  • Skype

18. movavi

movavi is an online video files converter. It supports multiple formats that you need for your videos. In just 3 simple step, you will get your converted video file and watch.

Web_apps_alternatives_18

Alternative for:

  • Videora
  • Xilisoft Video Converter
  • Other Video Converter Tool

19. HootSuite

HootSuite is a web apps for your social  networking experience. Updating and monitoring your social activities such as Twitter, Facebook, LinkedIn, WordPress and Ping.fm will be easy.It is also good for businesses that tracks statistics of their business over the web.

Web_apps_alternatives_19

Alternative for:

  • Social Network Tool
  • Statistics Tracking Tool

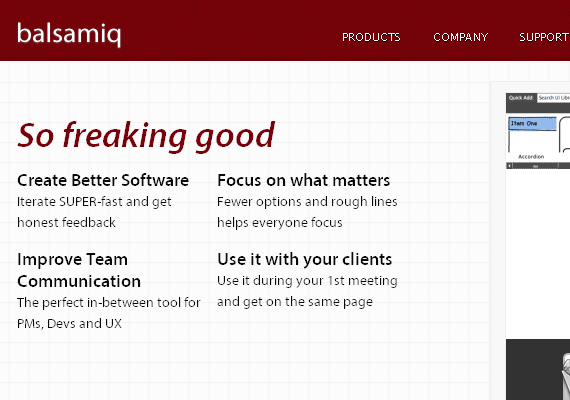
20. Balsamiq

Balsamiq is a web wireframing tool that is great for web designer and developers. It will make your drawing more in detailed and rearrange it easily.  It is a great tool to collaborate your team work.

Web_apps_alternatives_20

Hope you will enjoy this great web applications. If there are more great web apps that we missed, please tell us so and we will love to update it.


Compositing in Adobe Photoshop: Time-Saving Tips

16 Dec

Advertisement in Compositing in Adobe Photoshop: Time-Saving Tips
 in Compositing in Adobe Photoshop: Time-Saving Tips  in Compositing in Adobe Photoshop: Time-Saving Tips  in Compositing in Adobe Photoshop: Time-Saving Tips

Compositing is a skill and process that spans the entire spectrum of creative industries. At the high end, compositing boasts its own specialized profession in film and television post production and visual effects. Dedicated software such as NUKE and Shake have taken the craft to powerful levels of its own, leaving behind the relatively basic compositing toolset of Adobe Photoshop. However, for many graphics practitioners compositing is a vital everyday process — and as with all pixel-pushing endeavors, Photoshop remains the entry point and hub to learning and ultimately mastering the fundamentals of this important skill.

In this article, I’ll share some of my own time-saving tips for compositing in Photoshop. Tips such as these should never replace a solid understanding of your craft; however, being able to adapt a technique to make it work for you is part of being a creative professional. I encourage you to share your own creative compositing tips in the comments to this article, and think about how you have adapted existing techniques to work for you.

Tip 1: Matching Tones, Channel by Channel

One of the challenges we face when compositing is matching the colors and tones of various images to produce a realistic and convincing composite. This method aims to save you from spending time fiddling around with color balances and layers upon layers of adjustments, by showing you a systematic approach that should become second nature and enhance your compositing skill set.

1 Images in Compositing in Adobe Photoshop: Time-Saving Tips
These are the three images we will composite together

In the following example, we will composite three people into one shot and address the differences in lighting, tone and color balance. I use this technique most often as a way of quickly grouping my subjects into a similar tonal range for further global color adjustments.

1 Placedimages in Compositing in Adobe Photoshop: Time-Saving Tips
Masked images placed on background

In the above image, I have masked out the images and placed them together on a background. (Read on for some time-saving tips on masking.)

The key to this technique is selecting one of the images as your target, and then matching the other two images to the tone and lighting of this target. Out of the three images, I like the colors, tones and contrast in figure 1 the most, so I’ve chosen it as our target.

Throughout this article, you will see that I am using Smart Objects. This is an excellent habit to get into when starting any Photoshop workflow. Smart Objects allow us to perform non-destructive transformations on a layer, as well as non-destructive filtering.

Visual Evaluation

We are now entering the exciting world of greyscale tonal evaluation, deep inside the channels of our RGB image — the bare bones of bitmap imaging. We are going to go through each channel of the image and simply try to match the greyscale luminence levels to the target layer:

1. In the Channels palette, solo the red channel by either clicking the channel or using the keyboard shortcut Cmd/Ctrl + 3. You should see the entire image in greyscale, representing the luminance values of red.

2. Select the layer for figure 2 and add a Curves adjustment layer just above it. Make this adjustment layer a clipping mask by Alt/Opt clicking between the two layers in the layer palette. You could also select the adjustment layer and use the keyboard shortcut Cmd/Ctrl + Alt/Opt + G. Now select the red channel inside Curves.

1 RedCurves in Compositing in Adobe Photoshop: Time-Saving Tips

3. Now make a quick, overall visual evaluation of the two images: make a point right in the middle of your curve. If the mid-tones in your target layer (figure 1) look darker than your current layer (figure 2), move the midpoint down to darken the layer to better match your target. If the tones in the target appear lighter than your current layer, move the midpoint up to lighten the layer and better match your target. Use small increments, and continuously use your eyes to evaluate the changes.

If things don’t look quite right still, locate the lightest shade of grey (but not white, as this could be a specular highlight — not something you want to factor in much, with compositing) on the target image, and do the same with figure 2. With your eyes darting between these two greyscale shades, move the white slider on the Curves dialog box until the shades visually match. Next, do exactly the same process with the darkest part of the image, moving the black slider in the Curves dialog.

1 RedAdjustments in Compositing in Adobe Photoshop: Time-Saving Tips
Curves adjustments for the red channel

4. Swap over to the blue channel, by either clicking the channel in the Channels palette or using the keyboard shortcut Cmd/Ctrl + 4. Select the blue channel within the Curves dialog box. Perform the same adjustment, starting by creating a center point on the curve, and dragging until the mid-tones in your image match those in the target.

1 BlueCurves in Compositing in Adobe Photoshop: Time-Saving Tips
Curves adjustments for the blue channel

5. Repeat these adjustments for the green channel. Click the green channel in the Channels palette or use the keyboard shortcut Cmd/Ctrl + 5.

1 GreenAdjustments in Compositing in Adobe Photoshop: Time-Saving Tips
Curves adjustments for the green channel

6. You can now revert back to your RGB composite image by selecting the RGB channel in the Channels palette, or by using the keyboard shortcut Cmd/Ctrl + 2, and review the changes you have made. It is sometimes necessary to reduce the opacity of the adjustment layer if the change has been too drastic. Toggle the visibility of the adjustment layer to see a “before” and “after” for your adjustment. As we are using adjustment layers, our changes are non-destructive, so it is always possible to go back into the channels and curves to make further adjustments at any time.

7. Now, repeat steps 1–6 for figure 3, adjusting the curves per channel as before.

1 BeforeAfter1 in Compositing in Adobe Photoshop: Time-Saving Tips
(From left) “before” and “after” adjustments to figure 2

1 BeforeAfter2 in Compositing in Adobe Photoshop: Time-Saving Tips
(From left) “before” and “after” adjustments to figure 3

The registered changes make an excellent starting point to a compositing task, providing the perfect platform for further color corrections and adjustments. It is very rare that the image will be perfect at this stage, but the images will be more homogeneous and in a better relative condition to each other than before.

1 Composite in Compositing in Adobe Photoshop: Time-Saving Tips

As you get more comfortable with this technique, start adding additional points to your curves by sampling tones from your image using the Curves sampler tool.

Tip 2: Gradient Map with Soft Light

Although this is not essentially a compositing technique, it is an especially useful adjustment to perform on a composited image, where the colors and tones often require this type of homogeneous tweaking and subtle realignment. This technique works well as a final adjustment to an image. It has the effect of bringing all colors and tones slightly closer together, whilst still retaining their independence and relevance to the whole image.

1. Add a new Gradient Map Adjustment layer on top of all other layers. You will want to make sure that the layer thumbnail is selected, and not the layer mask thumbnail which is usually selected as default.

2. Next, turn off the visibility of the gradient map layer by deselecting either the eyeball next to the layer, or the eyeball at the bottom of the Gradient Map Adjustment panel.

2 GradientLayer in Compositing in Adobe Photoshop: Time-Saving Tips
Open a Gradient Map Adjustment layer, turning off visibility

3. Click on the gradient bar in the gradient map dialog box to open up the gradient editor. As default the gradient map is set to a black to white gradient — not particularly useful for this technique, but actually quite handy at giving us an initial idea of the direction the dark to light tones we will select, should be going in.

We are going to set ten points on the gradient bar — with colors picked directly from our image — going from darkest to lightest. First, click on the black point of the gradient and hover over the image; you should see the Eyedropper tool. Locate the very darkest point of your image and click; if it is black or very close to black, you won’t see much change in your gradient map. Now click just below the gradient bar, a small space away from the gradient point you just changed, to add a new gradient point.

Don’t worry about the distance between the points at this stage; we can change this at the end. Hover over your image again, select the next darkest area, and click. Continue with this process, adding progressively lighter points to the gradient bar all the way down to the white point, changing that to the lightest color in your image. You should aim to have ten points in total, although a few more or less is fine. Try to space out the points evenly before pressing OK.

2 GradientSamples in Compositing in Adobe Photoshop: Time-Saving Tips
Sample ten colors from your image on the gradient bar

4. Turn on the visibility of the gradient map layer once more. You will probably see a frightening rendering of your carefully composited image, and you may be wondering now what you have just gone and done. Don’t worry; this is to be expected. Change the gradient map layer’s blending mode to Soft Light and reduce the opacity until you are happy with the image once more. Check the change by toggling the adjustment layer visibility on and off.

2 BeforeComposte in Compositing in Adobe Photoshop: Time-Saving Tips
Before
2 Composte1 in Compositing in Adobe Photoshop: Time-Saving Tips
After

Tip 3: Black & White Overlay

This is a great, quick trick for compositing that is perfect for those times when simply closing the job is a priority. The effect applies a stylized adjustment which tempers the colors in the image and increases contrast, especially useful in stylized shots such as sports imagery. The effect of the adjustment immediately makes the images more congruent, and this is what compositing is about.

1. Add a new Black & White adjustment layer above all layers you want to affect, and set the adjustment layer’s blending mode to Overlay.

3 Bw in Compositing in Adobe Photoshop: Time-Saving Tips
Add the Black & White adjustment layer

2. The great thing about the Black & White adjustment layer is the amount of control it gives you over the desaturation effect you have made. Adjust the color balances in the adjustment panel, and finally reduce the opacity of the layer to an effect you are happy with.

3 Composite in Compositing in Adobe Photoshop: Time-Saving Tips
Final image with Black & White adjustment layer (set to overlay)

Tip 4: Lighting Direction

Often, one of the most difficult aspects of compositing is dealing with the direction light is coming from. Different images may be lit with the same intensity, with the same coloring and within the same tonal range, yet if the direction of the light is different, it can be fatal to the realism of the image.

4 Images in Compositing in Adobe Photoshop: Time-Saving Tips

The images above will be composited into one shot with an efficient, non-destructive way of addressing light directionality.

4 Placed in Compositing in Adobe Photoshop: Time-Saving Tips
Masked images placed on background

Once masked and placed on the background, we can see that the light on the two buildings is coming from opposite directions. We could flip one of the buildings horizontally, but this is often not an option in cases where we need to preserve the original angle and direction of an image.

Painting Shadows and Highlights

We will choose the light direction we wish to maintain, out of the two, and only work on the layer which we need to change. There are a multitude of methods for painting in shadows, so my main piece of advice is: do it non-destructively. Try this method:

1. Add a new Curves adjustment layer above the layer you wish to affect. Make this adjustment layer a clipping mask by Alt/Opt clicking the line beneath the layer in the layer palette. You could also select the adjustment layer, and use the keyboard shortcut Cmd/Ctrl + Alt/Opt + G.

2. Make a point on the middle of the curve and move downwards to darken the layer. Fill the adjustment layer’s mask with black, and paint with a soft white brush into the layer mask to add shadow.

4 Shadow in Compositing in Adobe Photoshop: Time-Saving Tips
Shadow added to building

3. Reduce the opacity until you are happy with the effect. You can always paint back into the layer, or use lower-opacity brushes, to get the effect just right.

4. To neutralize the shadow which exists on the wrong side of this same building, repeat the process by adding another Curves adjustment layer and setting it as a clipping mask. Add a mid point to your curve and move the curve upward to lighten the image. Fill the adjustment layer mask with black, and paint with a white brush over the shadow you wish to remove. Reduce the opacity quite a lot, until the shadow is no longer prevalent.

Of course the composited image is still nowhere near perfect, but that change in lighting has made a difference which now lets us imagine these images could exist in the same world; that’s a great starting point for a compositing task.

4 Highlight1 in Compositing in Adobe Photoshop: Time-Saving Tips
Shadow is neutralized

Tip 5: Super-quick Previewing Using Blending Modes

Blending modes and tools offer a really powerful set of compositing features which can be used to speed up a lot of tasks. The following is a very simple trick which many people know about, but often forget.

Here is the scenario: you need to composite an image of a glass of milk on an image of a table.

5 Milk in Compositing in Adobe Photoshop: Time-Saving Tips5 Table in Compositing in Adobe Photoshop: Time-Saving Tips
Sourced images for compositing

You have sourced the images you think would work together, and you need to check if the glass will sit realistically on the table, if the angles will line up and if the perspective will be convincing. However, you are so squeezed for time that even a rough trace of the glass would take too long. Luckily for you, the glass of milk has a black background.

Removing Black or White

Photoshop offers ready-made blending modes for removing black and white from one layer placed on top of another. The Multiply blending mode will render white pixels transparent, while the Screen mode does the same with black pixels. Both blending modes will also affect how other tones in your layer interact with the layer below, so unless this effect is something you are going for, this technique is usually best used to preview images which are on solid black or white backgrounds. This is massively time saving, and is a great way of ensuring you are happy with the image before you commit to masking it out.

This can also help you when sourcing images for a time-sensitive task; knowing that solid black or white backgrounds can be so easily removed for previewing will help you identify the images most appropriate for your use.

5 CompositedGlass in Compositing in Adobe Photoshop: Time-Saving Tips
Preview of how the elements fit, using only blending modes

Tip 6: Masking

Masking out an image is key to almost all compositing workflows, and is often the most time-consuming, tedious part. You have two main areas of masking to choose from when an image needs to be isolated from its surroundings. Manual masking is the preferred method of most top graphics professionals: usually this means using the pen tool, brushing in Quick Mask mode, or using the images channels to create an Alpha Channel mask. Alternatively, automatic masking can be effected from an ever-increasing range of tools and third-party plug-ins within Photoshop. Which method you choose will often be determined by how much time you have, the complexity of the task and the intended use of the image.

Rather than going through every masking technique (there are plenty of resources out there, if you want to learn about how each tool works), here is a quick run down of some time savers.

Quick Mask for Web Imagery

It might sound obvious as a time-saving trick, but when you need to mask an image in super-quick time, the Quick Mask really can be a life saver. I use it for Web imagery, as the edge details will then not be so apparent at the fixed pixel view the user will have. It is also important to choose an image with decent contrast between your masking subject and its background, or the Quick Selection tool will not do a great job with really tough selections.

6 Quick-selection in Compositing in Adobe Photoshop: Time-Saving Tips
Quick Mask tool

Know Your Background Color

You can often save a lot of time masking, if you know and bear in mind what background your masked image will be composited on. Keep you goal in mind; when you need to get the job done, release your mind from the constraints of perfect masking and do the bare minimum!

Refine Edge

The Refine Edge tool set is a very powerful, non-destructive set of tools to help you refine any selection that is currently active. It can save you time, in fixing problem edges you may have encountered with other selection tools. The values in the Refine Edge dialog box remain constant from one adjustment to the next, meaning this tool can also be great for ensuring the edges of composited images have the same level of softness, smoothing and contrast.

For Photoshop CS5 only: Photoshop CS5 has a time- and frustration-saving tool lodged inside its Refine Edge feature which can yield outstanding results. When it comes to masking fine details, every designer will tell you that hair is the most challenging. The Edge Detection tool allows you to identify the unwanted colors in your image while intelligently masking edge details; it can effectively identify the finest hair details and mask them out in a non-destructive dialog box, with minimal work on your part, and do a very convincing job.

6 Refine-edge in Compositing in Adobe Photoshop: Time-Saving Tips
Refine Edge dialog box

Pen Tool

One thing I always do with the Pen tool, is keep a finger hovered over the Alt key; this is really useful as at any point, you can hold it down to move just one handle, and to freeze the corresponding handle in place. You can also Alt-click any point on your path to toggle between a corner point and a smooth point.

Conclusion

There is no shortcut to becoming proficient on your chosen tool or in your chosen craft, be it Photoshop or anything else; but once you have mastered a tool and understand its power, it is then up to you to do what you do best: be creative with it. This means looking at those everyday tasks you do, the time limitations you are faced with and your ability to improvise. Look under the hood once in a while, and be creative and inventive with everything you do!

Further reading

(wcp) (vf)


© Daniel Durrans for Smashing Magazine, 2010. | Permalink | Post a comment | Add to del.icio.us | Digg this | Stumble on StumbleUpon! | Tweet it! | Submit to Reddit | Forum Smashing Magazine
Post tags: , ,


Font Discovery Services for Designers

13 Dec

As web and graphic designers, fonts play an increasingly bigger role in our work. Sometimes, a client gives us a logo that’s really just a 200 pixel wide jpeg image rather than a true vector based logo. The task of figuring out what font is used in that logo used to be tricky, if not impossible.

Thankfully, the surge of web based design tools benefits this situation, and there are a few font discovery services available online that can save hours of work looking for a specific font.

First, let’s talk about how these sites work. Usually a file of with your font is uploaded (or linked via a url) to the site, then scanned to find glyphs that match a font. This only works with letters with spacing, so sometimes a bit of Photoshop work needs to be done to separate letters that have been kerned and tracked very closely together.

Once your image is uploaded, a list of the closest fonts is given, usually with links to either download or purchase the font.

For the What the Font service from MyFonts, the first step is to upload or link an image. Then comes the character selection screen, where your image shows up split into as many characters as the site can see, with a text box beneath.

If it’s an easy one, What the Font will have these character boxes filled in with the correct letters, although the user is supposed to make sure the text box is the character highlighted in the image before going to the last step.

Character boxes are supposed to be left blank if no valid character is highlighted from your font, so that the system doesn’t pick up the wrong font. Testing a few logos on here, What the Font did a good job of finding the correct font, but only with separation.

In my experience the system works about half the time, of course this is totally dependent on your file, but What the Font did miss some widely used (and well spaced) fonts from some of the samples I tried. What the Font does have an iPhone app available, where users can bring font discovery with them on the road.

The WhatFontIs service is very similar to What the Font in the way it works, but they’ve added one little touch that seems to help a lot: the ability to select if an image is on a dark background where the image is inverted prior to processing.

This lets darker images and logos be used. One of the best things about WhatFontIs is that on the results page the font matches are shown with the characters selected, creating the word you were looking for in a list of possible font matches. This is very similar to the way well known free font directory DaFont allows most fonts to be previews with a word or phrase.

The service itself seemed to perform at the same level as What the Font, but interestingly enough the results on some of my test images returned a completely different lists of font matches. There’s also a selection to look for just free fonts, commercial fonts, or both.

These two font discovery tools are very useful for web and graphic designers that need to quickly and efficiently find a specific font for a project. What has your experience been with font discovery services?


10 Great Web Services to Make Your Life Easier

08 Dec

Mighty Deals

md

Mighty Deals offers a one-stop shop for creative professionals and trusted merchants to meet and reach out to each other, quickly and easily.  This service offers unbelievable deals and discounts for creative professionals. The deals include products and services that are heavily discounted, usually from 50% to 90% off.

AppSumo

AppSumo

AppSumo is like GroupOn for web apps. AppSumo is offering $1,543 worth of Bad Ass Developer products and services like Twilio, Heroku, Recurly and MongoHQ for only $47. In the bundle they are offering six months of SendGrid’s e-mail deliverability service, valued at $479.

Curio

Curio-7

Curio 7 is the newest version of the Curio app for Mac, which allows for better organization of creative projects. This version adds a bunch of new features, and is easier to use than previous versions.

RailsWizard

RailsWizard

RailsWizard simplifies the creation of new Rails apps, by using a wizard to walk you through setting up the initial elements of your app. You can enter everything from the Database/ORM to the JavaScript framework and plugins to the templating engine and more.

DNSimple

DNSimple

The company has the following motto:

“We make DNS simple with low cost hosted DNS, an easy to use web interface and a REST API for automation. With DNSimple, hosted DNS has never been this simple.”

The Square Grid

The-Square-Grid

The Square Grid is a new CSS framework that works based on 35 equal-width columns. It also provides a 28px baseline-grid for smooth vertical rhythm.

BrushLovers

bl

BrushLovers has one of the largest collections of exclusive and high-quality Photoshop brushes on the Web.

GmbhNews Mobile

GMBH-News

GmbhNews Mobile is a mobile site creation tool to help publishers create and monetize their mobile sites in less than 2 minutes. The mobile tool is disruptively easy to use and is one of the best solutions on the market if you don’t want to deal with html/css/js coding or other plugins. While the service cost $9 on the basic plan, it comes with a 30 days free trial and allow you to monetize your mobile traffic, and even earn more revenue than you spend to create the mobile site.

jMockups

jMockups

jMockups lets you design pixel perfect website mockups before you write a single line of HTML orCSS.

HOTforms 123

HOTforms123

HOTforms123 offers a free Online Flash Form Builder that makes creating and personalizing web form templates a snap.


An Apache Mod. By Google For Faster Websites

04 Nov

Google is so decisive on making the web faster with the tools and resources it creates. Also remember that they had announced "speed being a factor in Google's search rankings".

Google is now sharing an open source Apache module named mod_pagespeed that automatically optimizes web pages.

mod_pagespeed

It works with Apache 2.2 and includes several filters that optimize JavaScript, HTML, CSS stylesheets, JPEG and PNG images.

For the other members of the Page Speed family like the Page Speed extension, check this.

Special Downloads:
Ajaxed Add-To-Basket Scenarios With jQuery And PHP
Free Admin Template For Web Applications
jQuery Dynamic Drag’n Drop
ScheduledTweets

Advertisements:
Professional XHTML Admin Template ($15 Discount With The Code: WRD.)
Psd to Xhtml
SSLmatic – Cheap SSL Certificates (from $19.99/year)

Tags: ,

Related posts


An Apache Mod. By Google For Faster Websites

04 Nov

Google is so decisive on making the web faster with the tools and resources it creates. Also remember that they had announced "speed being a factor in Google's search rankings".

Google is now sharing an open source Apache module named mod_pagespeed that automatically optimizes web pages.

mod_pagespeed

It works with Apache 2.2 and includes several filters that optimize JavaScript, HTML, CSS stylesheets, JPEG and PNG images.

For the other members of the Page Speed family like the Page Speed extension, check this.

Special Downloads:
Ajaxed Add-To-Basket Scenarios With jQuery And PHP
Free Admin Template For Web Applications
jQuery Dynamic Drag’n Drop
ScheduledTweets

Advertisements:
Professional XHTML Admin Template ($15 Discount With The Code: WRD.)
Psd to Xhtml
SSLmatic – Cheap SSL Certificates (from $19.99/year)

Tags: ,

Related posts


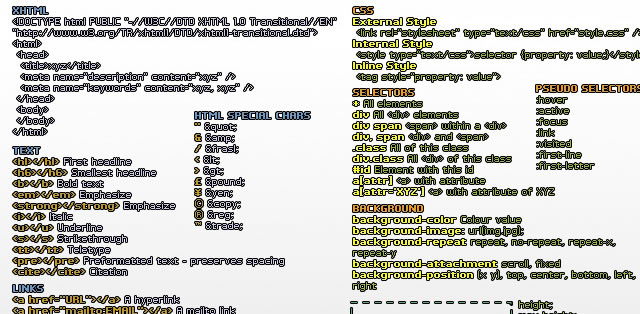
Useful Collection of Cheat-Sheet Desktop Wallpaper for Web Designers

07 Oct

Typical cheatsheets tend to be over-sized documents, far too large to be viewed in its entirety on a desktop and not too handy for the super-fast reference that is needed. To get the full benefit of any cheatsheat, your only real option is to print it out and keep it close at hand. Wouldn’t it be nice if there was an easier way, a quicker way. Of course there is – what good be handier than having a cheatsheet set as your desktop wallpaper? Always there for quick reference, no need to print it out and no need to scroll through an over-long document.

In this post we have rounded up a selection of cheatsheet wallpapers, in various sizes, covering various technologies, like CSS, HTML5, WordPress, Javascript and many more.

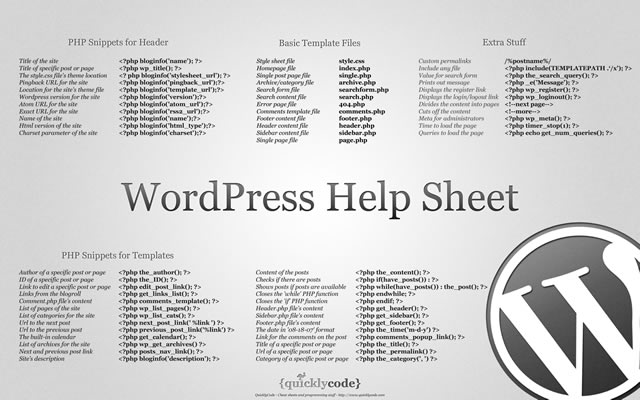
WordPress Help Sheet Wallpaper

WordPress Help Sheet Wallpaper
The WordPress Help Sheet Wallpaper is a simple desktop wallpaper listing Basic Template Files, PHP Snippets for the Header, PHP Snippets for the Templates, Extra Stuff for WordPress, based on the WPCandy WordPress Help Sheet.
Download: 2560x1600px.

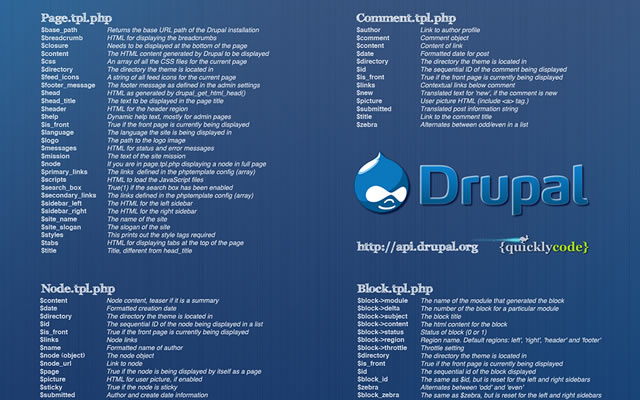
Drupal Cheat Sheet Desktop Wallpaper

Drupal Cheat Sheet Desktop Wallpaper
The Drupal Cheat Sheet Desktop Wallpaper is a desktop wallpaper that features the most popular variables of the open source content management system Drupal.
Download: 1024x768px – 1280x800px – 1440x900px – 1680x1050px – 1920x1200px.

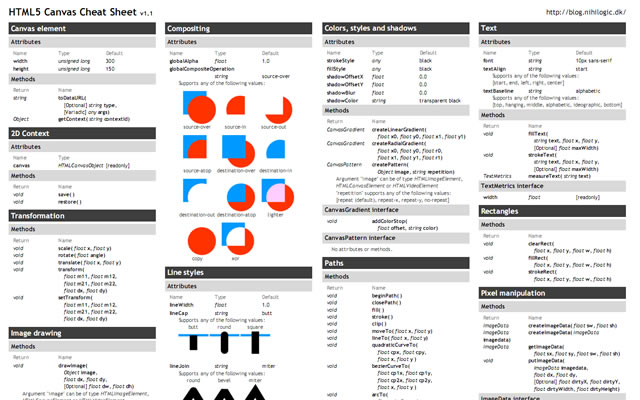
HTML5 Canvas Cheat Sheet

HTML5 Canvas Cheat Sheet
The information on this wallpaper is pretty much just a copy of what is found in the WHATWG specs, just condensed and a little bit easier to read. There are virtually no explanations, and no examples other than some graphics for compositing values. It's basically just a listing of the attributes and methods of the canvas element and the 2d drawing context.
Download: 1388x1027px.

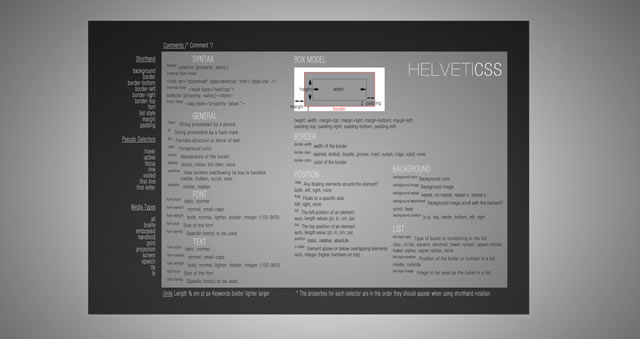
CSS Cheat Sheet Wallpaper in Helvetica

CSS Cheat Sheet Wallpaper in Helvetica
This is the very popular CSS cheat sheet in Helvetica from styl.eti.me. Simplistic in appearance, but very useful for quick referencing. Unfortunately we can not find a working download link for this cool wallpaper, but the good news is they do have a PSD version available. So download it and resize.
Download: CSS Cheat Sheet Wallpaper in Helvetica.

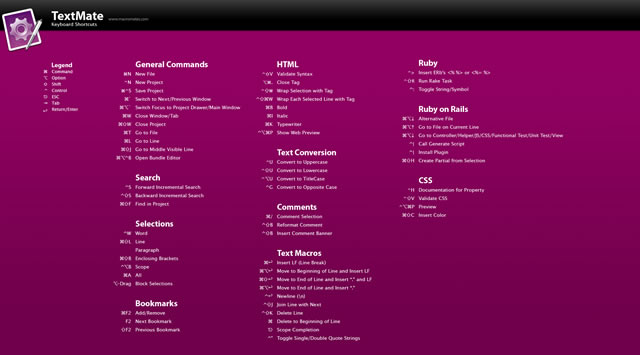
TextMate Shortcuts Wallpaper

TextMate Shortcuts Wallpaper
Here is a TextMate wallpaper that will guide you through some of its powerful features and help you get a handle on all of the keyboard shortcuts. The PSD file is also available.
Download: 1280x800px – 1920x1200px.

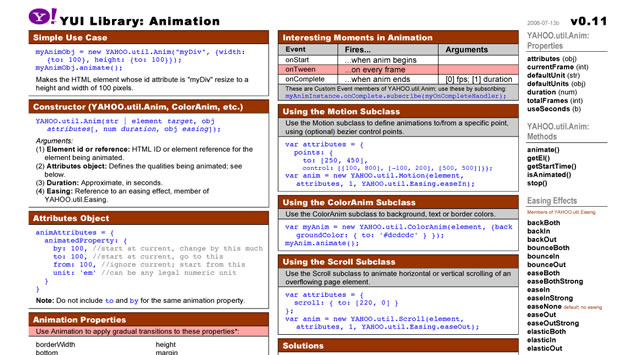
Yahoo! UI (YUI) Cheat Sheets as Wallpaper

Yahoo! UI (YUI) Cheat Sheets as Wallpaper
Yahoo! provides a number of cheat sheets for their YUI library widgets however these are all in PDF format and not usable as wallpaper. However, here you will find all of those cheatsheets converted to PNG images of various sizes all for your desktop.
There are wallpapers available for Animation, Calendar, Connection Manager, Dom Collection, Drag & Drop Event, Utility & Custom Event Logger, Slider and TreeView. And all are available in the following desktop sizes: 1400x1050px, 1280x960px, 1165x900px and 1024x768px.
Download: Yahoo! UI (YUI) Cheat Sheets as Wallpaper.

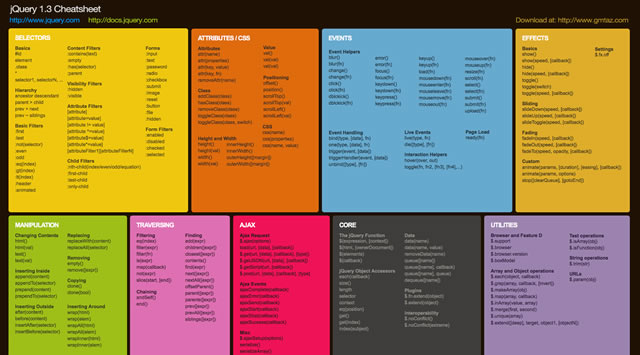
jQuery 1.3 Cheat Sheet Wallpaper

jQuery 1.3 Cheat Sheet Wallpaper
Download: 1440x900px – 1680x1050px – 1920x1200px.

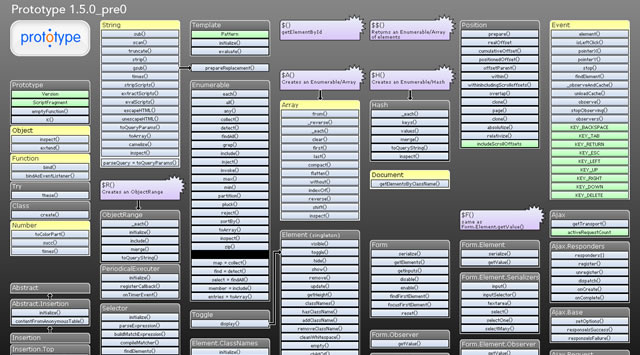
Prototype Dissected Wallpaper

Prototype Dissected Wallpaper
If you need a little help in getting to know Prototype a little better and some help in understanding how the code works, then this is the wallpaper for you. You have a choice of either a dark or white wallpaper, and are available in these sizes: 1280x960px and 1440x900px.
Download: 1280x960px (Dark) – 1440x900px (Dark) – 1280x960px (White) – 1440x900px (White).

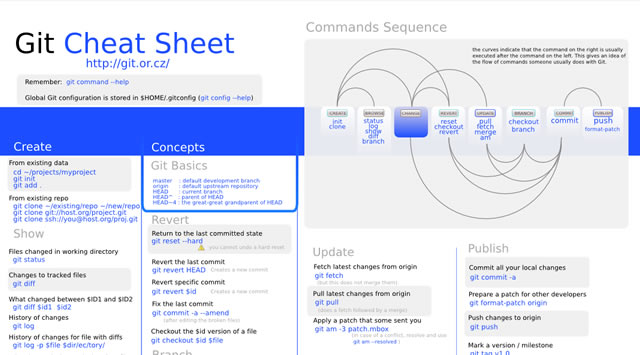
Git Cheat Sheet Wallpaper

Git Cheat Sheet Wallpaper
Download: 1100x850px – 3300x2550px.

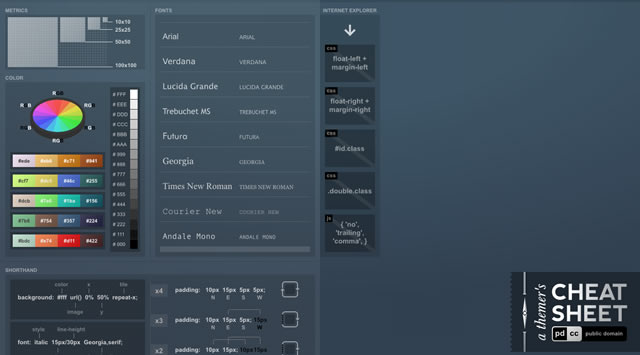
A Themer's Cheatsheet Wallpaper

A Themer's Cheatsheet Wallpaper
A Themer's Cheatsheet Wallpaper is a quick refresher of web design fundamentals directly on your desktop. It is available for download in several different colors and the original SVG has been released to the Public Domain.
Download: 1280x800px (Blue) – 1280x800px (Red) – 1280x800px (Black) – 1280x800px (Green).

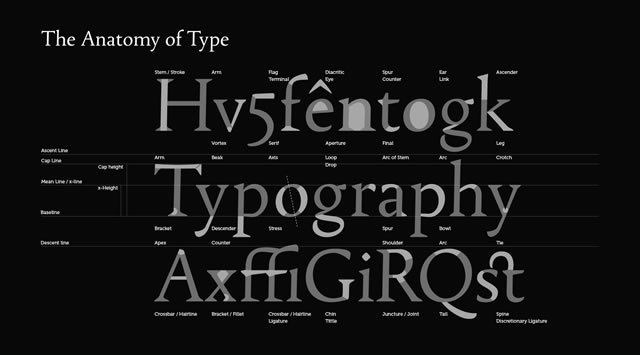
Font Anatomy Wallpaper

Font Anatomy Wallpaper
Download: 1920x1200px.

SEO Wallpapers

SEO Wallpapers
Think of it as a desk reference checklist that is always at your fingertips. From pre-campaign to reporting, the basics (and more) are right here for you to put directly on your desktop.
Download: 1024x768px – 1280x960px – 1280x1024px – 1440x900px.

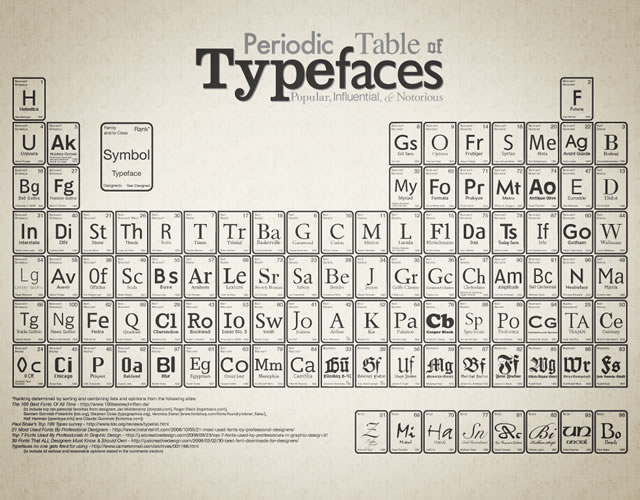
Periodic Table of Typefaces

Periodic Table of Typefaces
Download: 1024x768px – 1280x800px – 1280x1024px – 1440x900px – 1680x1050px – 1920x1200px.

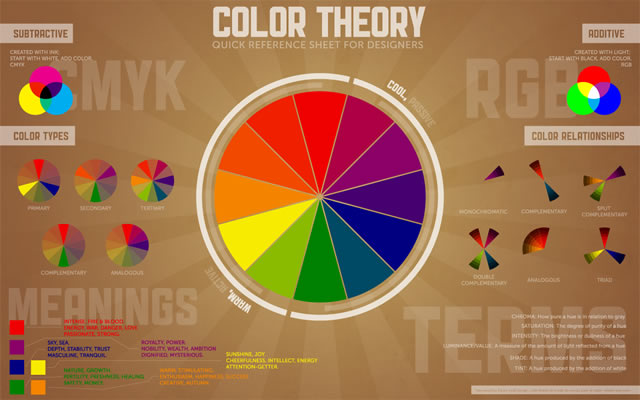
Color Theory Quick Reference Poster

Color Theory Quick Reference Poster
The Color Theory Quick Reference Poster for Designers has all of the basics of color theory contained in one place – specifically, a cool infographic-esque poster. This way, you can quickly reference things that may have slipped to the back of your mind since design school.
Download: 1280x800px – 1440x900px – 1680x1050px – 1920x1200px.

Web Designer Wallpaper

Web Designer Wallpaper
Download: 1280x1024px (White) – 1280x1024px (Dark) – 1680x10050px (Dark) – 1280x1024px (White).

You might also like…

14 Essential WordPress Development and Design Cheat Sheets »
17 Productive Photoshop Cheatsheets and Reference Cards to Download for Free »
The Best Cheat Sheets for Web Designers and Developers (From CSS, Ajax, Perl, Vbscript…) »
CSS References, Tutorials, Cheat Sheets, Conversion Tables and Short Codes »
20 CSS3 Tutorials and Techniques for Creating Buttons »
50 Useful Tools and Generators for Easy CSS Development »
50 Essential Web Typography Tutorials, Tips, Guides and Best Practices »
The Blueprint CSS Framework – Tutorials, How-to Guides and Tools »


My Favorite Web Applications for Designers

17 Jun

As we all know, there are many web tools available to designers online, so instead of listing ALL of them, I've decided to share my favorites that I use on an everyday basis. FYI, this doesn't include mac apps or programs, just online web tools and a couple of firefox plug-ins. Enjoy!